
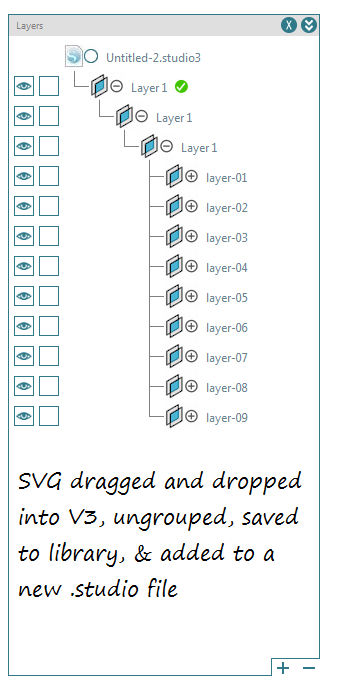
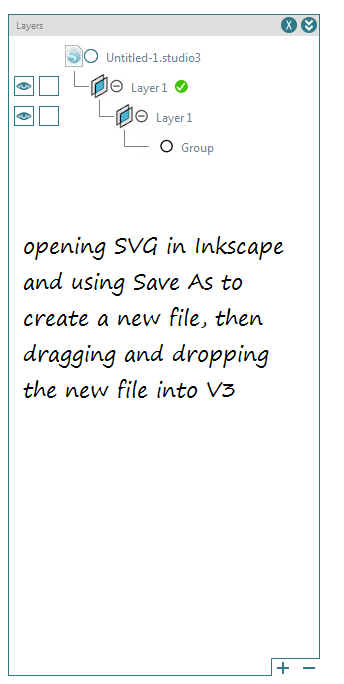
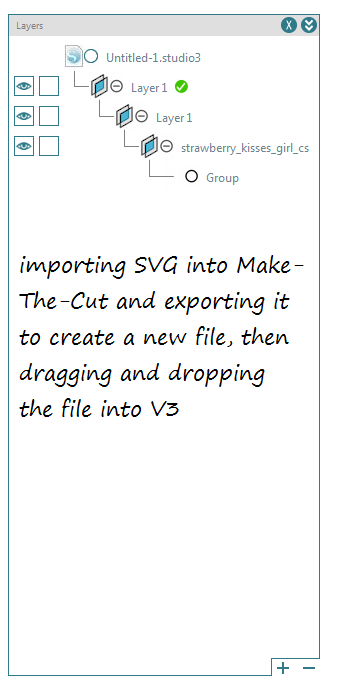
The week started off with on a high note. The new products had been posted on the previous Friday and since learning that we would have to upgrade to use the new mats, most were trying to be optimistic about it. The momentum kept up during the first impressions, but then, while digging a little deeper, problems started coming up. The party stopped altogether once the realization hit that some SVG’s could not be manipulated as they once were–at least, not without having to use a workaround. I figured out you could re-save the SVG’s in Inkscape or Make-The-Cut first before importing to make it work like it does in V2. I also found out what the difference was between the files. In the SVG directly imported to V3, each color had its own layer while also being in another layer. Re-saving in MTC or Inkscape puts all the colors in one layer.
I was going to post my first impressions of V3 with many good comments about it, but the layer problem has taken all the attention. Now we have this pink elephant in the room that’s turned red because it’s an embarrassment that they would release layers still being broken. This is a designer edition only feature! This is one of the reasons why they say you should upgrade! Layers are so broken that even basic users are affected by it, but they can’t see the layers window to know what is going on.
I spent on and off yesterday actively working on and passively thinking about this problem. It wasn’t until late in the night that I had been going about it all wrong. I already knew the solution from past experiences. Instead, I went all gung-ho and tried multiple converters and attempted to use the command line to batch convert. It was a waste of time because they don’t touch what is wrong.
It’s the layers.
Back when I was trying to get along without the designer edition, I found a SVG to DXF plugin and to convert an SVG involved ungrouping the layers before saving. Last night, I realized that’s the key to the workaround.
So, what’s going on with the layers?
I’ll be demonstrating how the layers currently work through how it currently is and the workaround. I have used only one SVG for all the tests, a girl from Strawberry Kisses, a recent freebie from Lettering Delights.


Workaround #1

Workaround #2
Workaround #3
Workaround #4
Workaround #5

To be continued.. In the next part, I’ll be explaining how to do my preferred method and you’ll be organizing your collection at the same time if you follow along!

sophisticated! Global Push for Universal Basic Income Intensifies 2025 joyful